
Creating & Managing Templates
Templates
Section titled “Templates”Before you can issue a pass you need a design of what that pass will look like. This is a template.
A template determines the layout, colour scheme, images and information displayed on the pass.
If a barcode is required, it also determines the barcode type used by each pass.
Base templates
Section titled “Base templates”Smartix provides a selection of template types as starting points for your own templates.
Apple and Google offer different pass types, layouts and functionality. Smartix base templates combine a suitable Apple pass type and Google pass type so you do not have to work out the pairing yourself.
Standard vs Managed vs Specialist templates
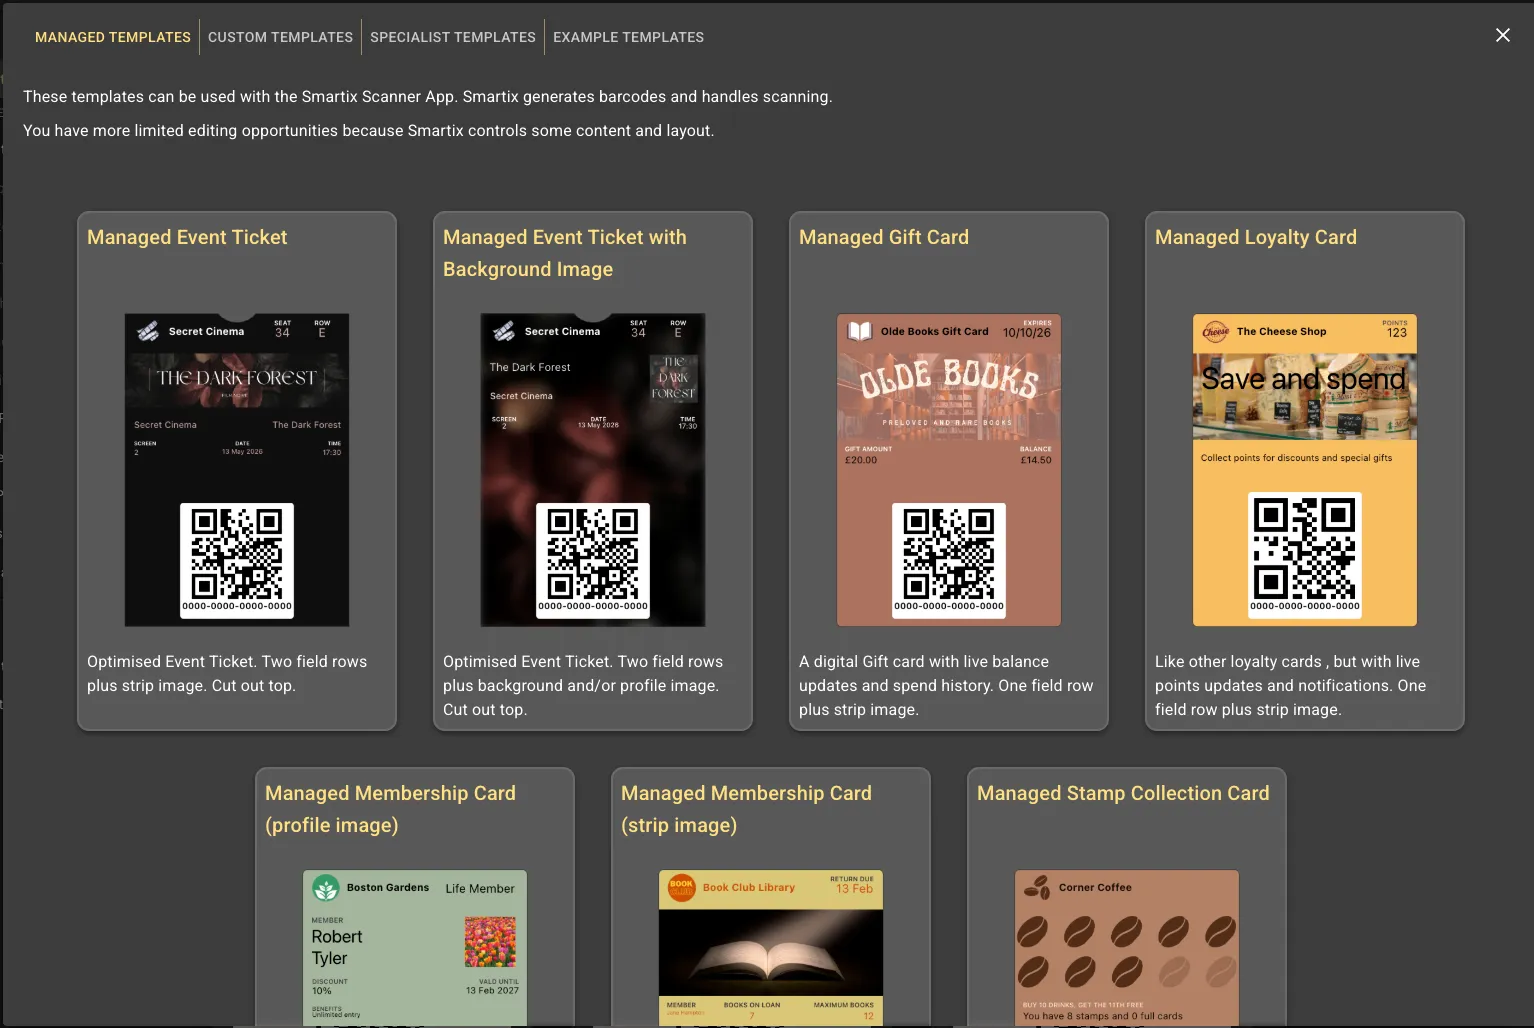
Section titled “Standard vs Managed vs Specialist templates”Smartix offers three types of pass template (specialist templates are available on request).
Standard templates
Section titled “Standard templates”Choose one of these if you will be using your own scanning equipment and validating barcodes with your own systems. These templates offer the widest choice and maximum customisation options.
Managed templates
Section titled “Managed templates”These are aimed at users who do not already have any systems in place that might be used to scan and validate passes. You use the Smartix Scan App to validate and interact with these passes. The range of passes and customisation options are more limited, but you can be up and running with these quickly and with no additional cost.
Specialist templates
Section titled “Specialist templates”Sometimes a pass needs behaviour that is difficult to produce with the standard options. We have, for example, UK Train tickets, all approved by RDG for use by licensed retailers. Our templates for These include automatically generated itineraries and carnet-ticket activation.
These features cannot be reproduced reliably with a standard template.
If you have a need for something more complex, then do get in touch and we will see what we can do to assist you by with a specialist custom template.
Choosing your template
Section titled “Choosing your template”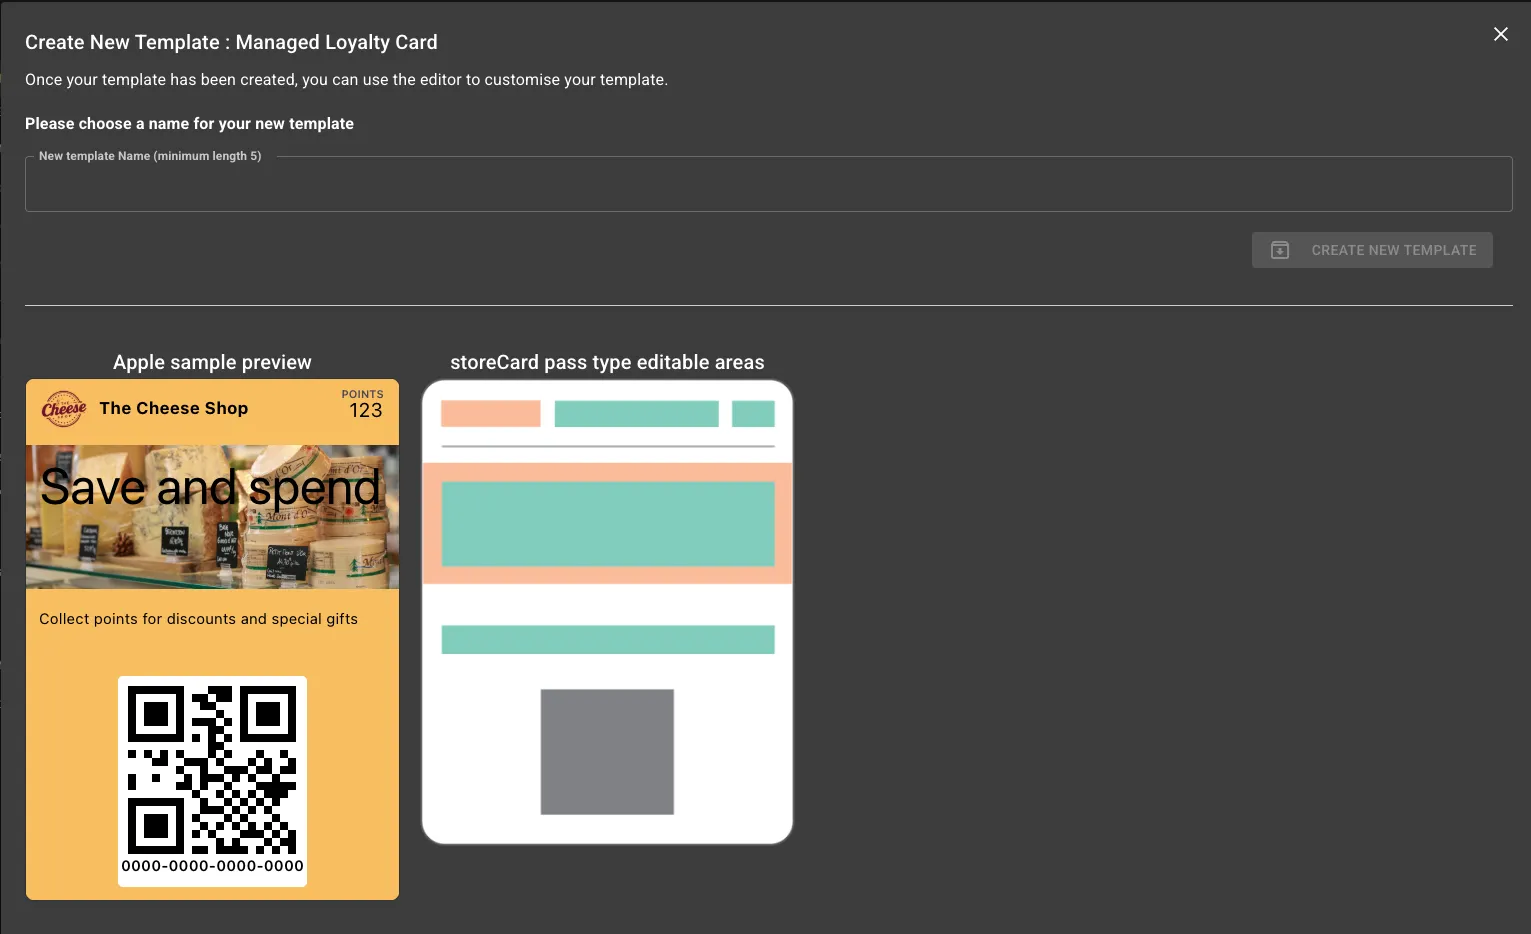
After clicking a template option you will see sample Apple and Google passes and outline images showing the editable regions.
In addition there is a detailed description of the pass type and possible uses.
Enter a name for your template, then create it.
After a short while your new template will appear in your template list.
Duplicate a template
Section titled “Duplicate a template”The other way to create a new template is to duplicate one you created previously. This will make an exact copy that you can then edit freely.
Select a template in the template list and choose Duplicate template. Studio asks for a new name; after confirmation the duplicate becomes the current template and opens in the editor.
Template list
Section titled “Template list”The template list can be access from the dashboard or from the main menu.
The list shows active and archived templates. Archiving preserves a template and its history; it removes it from normal issuing and editing until it is unarchived.
Search, filters, sorting, column visibility, density and export tools are available. Exports can be JSON, CSV or Microsoft Excel.
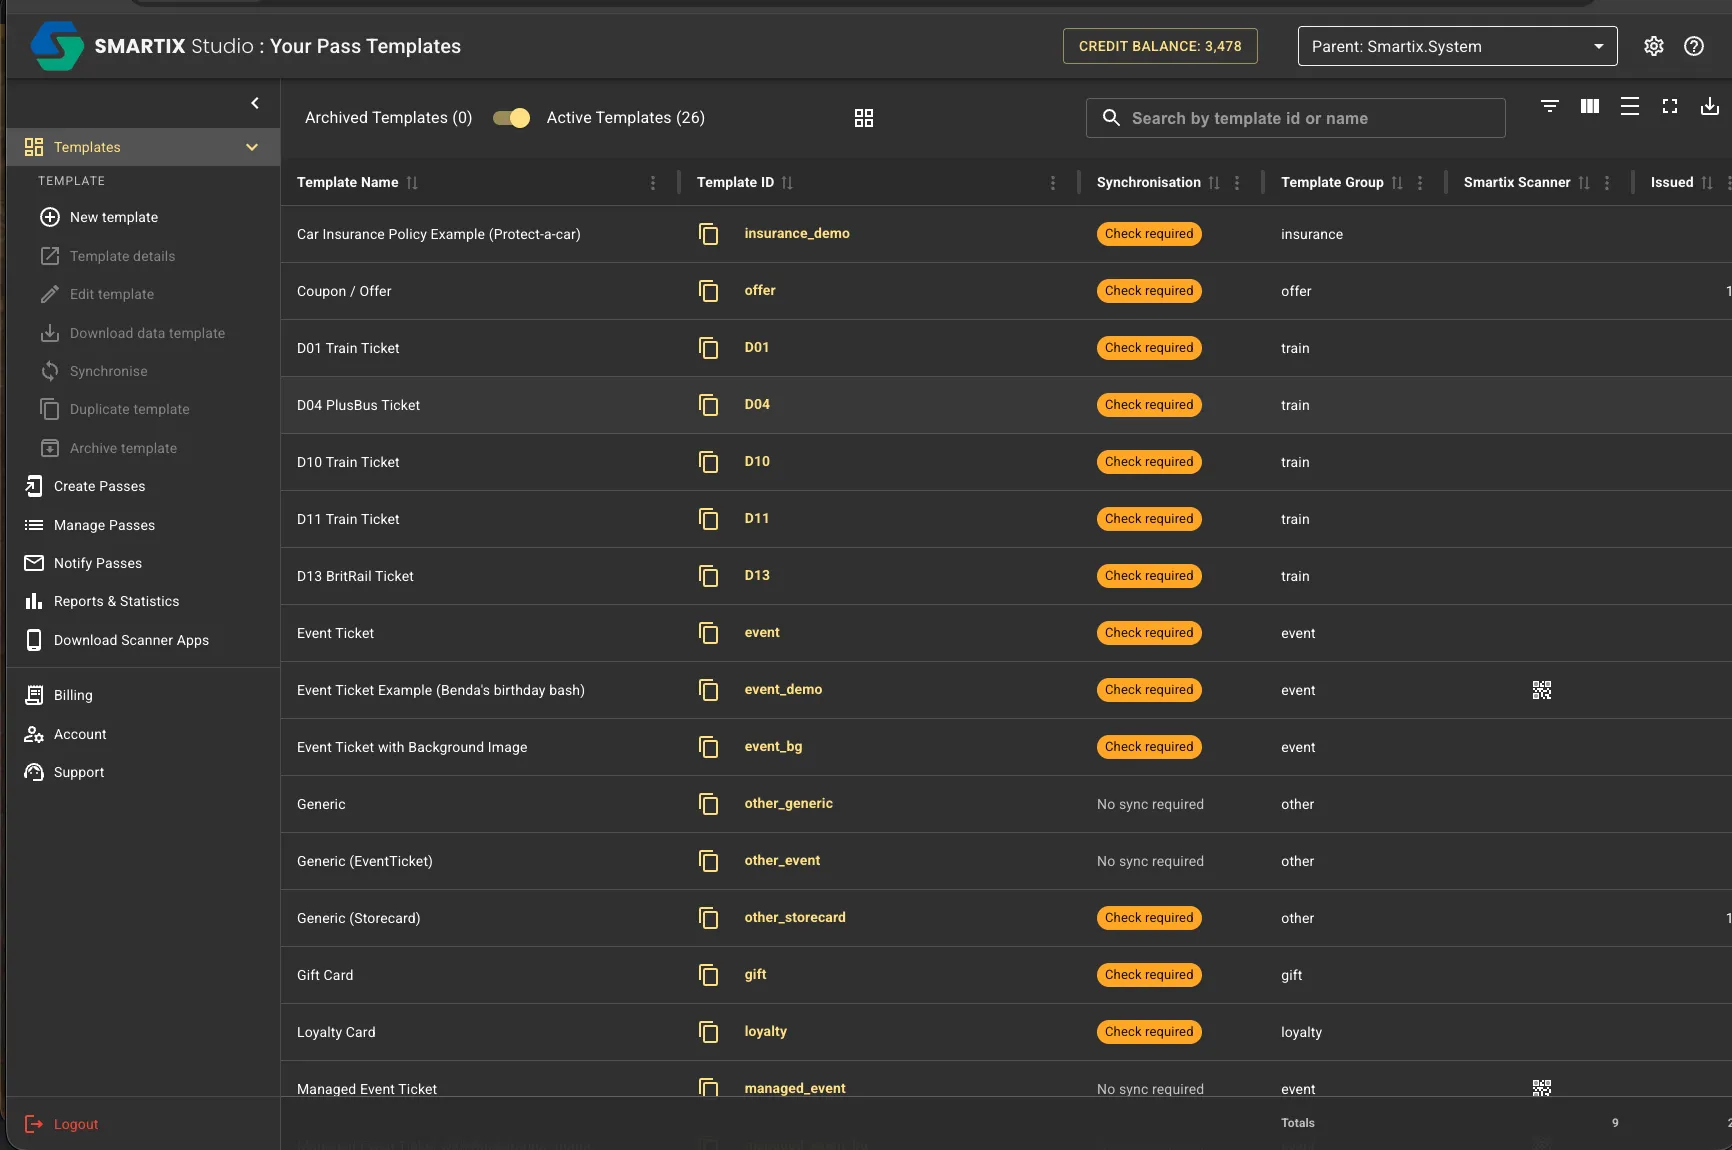
Columns include live-pass counts, expired and installed totals, and synchronisation status.
Click on a template name to drill down to see the details for that template. Click a row or preview card to select a template. Double-click to open the editor. The sidebar menu provides actions for the selected template.
Template details
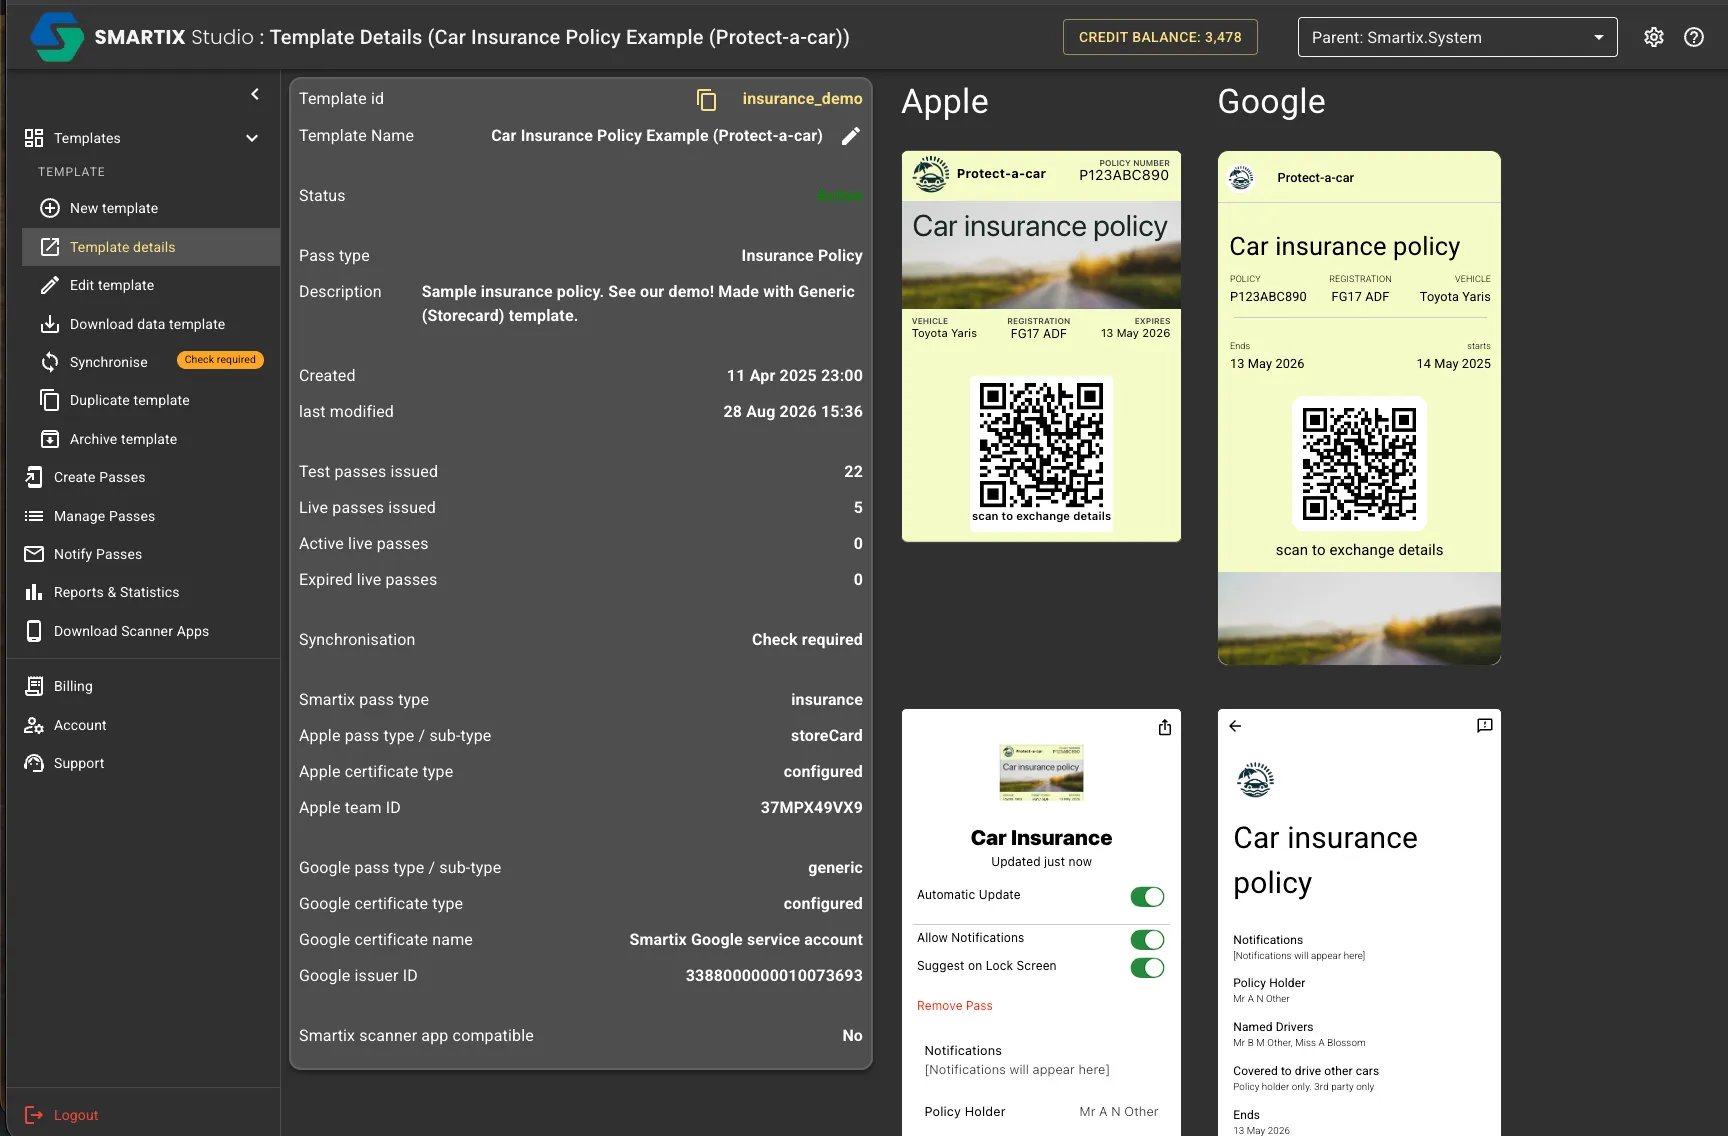
Section titled “Template details”Once you drill down to a template the first thing you see is the details page. This gives you an overview of what that template looks like, passes issued etc.
The top menu bar give you a range of options.
Template editor
Section titled “Template editor”Duplicate template
Section titled “Duplicate template”Make a copy of the current template. This can be a better option than creating a new template if you need one similar to an existing one.
Issue passes
Section titled “Issue passes”See Issue passes
Statistics
Section titled “Statistics”Some basic statistics detailing when passes have been issued.
Notify all
Section titled “Notify all”See Notifications
Synchronise
Section titled “Synchronise”Archive
Section titled “Archive”This moves a template to the archived list. A similar option exists to recover a template from the archive.
When a template is archived it cannot be used to issue passes, nor can you send notifications or updates. However, one click is all it takes to recover an archived template back into your active list.